The "5-year" plan

When we moved into our house in 2005, we had agreed that it was a 5 year plan. In five years, the house would be painted and landscaped to our tastes. It would be done...

It's 2011.
The projects are never-ending, we have a dirt mound in our driveway the size of a suburban, It's dark out and we're still working... hit it.

Welcome to our journal about dirt, gardens and beer.

Saturday, February 4, 2012

Project #5 this summer. FINAL PROJECT. Mowing strip along front walkway

Our final project this season is to create a mowing strip along our front walk.  It is very difficult to mow currently.  Our property is every so slightly sloped, thus the need for the stepped walkway.

I plan on finding antique / reclaimed brick similar to those pictured above.  When everything is done, the brick mowing strip will flow into the "brick" front porch.


How To Install The Mowing Strip:

Step 1

Measure the walkway. Standard bricks are 4 inches wide and 8 inches long; use other types if you prefer but make sure that they are designed to be used in ground installations.

Step 2

Dig a trench around the walkway at least 4 inches deep. Make your trench wide an inch wider than your bricks so that there will be room to work bricks into the sand.

Step 3

Fill the trench with sand up to about an inch below the surface and tamp it down well by walking around it or leaving it to settle for a few days.

Step 4

Lay your bricks in a line or across the sand and work them into the sand foundation until they sit evenly against the edge of the grass. Lay them flat, on end or tip them on their sides. Add a second row of bricks inside as a "curb" around the bed. Tilt bricks against each other in a sawtooth pattern. Use a mallet and board to tap them so they sit evenly.

Step 5

Sprinkle some sand around the edging to fill any gaps and backfill the edging from the garden side with soil. Water the edging well to settle the bricks into the sand.


  • START: Start by Sept 1.
  • MATERIALS LIST:  reclaimed brick
  • ESTIMATED COST: relatively inexpensive, depending on where the brick is acquired.
  • PROJECT DETAILS: SEE ABOVE
  • PROJECTED TIME LINE: 2 weeks
  • WORKERS FOR PROJECT: 2 (Honey bunny and me)

Friday, February 3, 2012

Project #4 this summer. New Garage Door(s)

Only one of our garage doors currently opens, the other has to be manually lifted.  To complete this project will will need to also get a garage door opener for the larger of the two doors.

We plan  to get a new large energy efficient door to match the existing small door.  The large door is not insulated and lets considerable amounts of cold air in during the winter months.

the second part of this project is to turn these standard garage doors into faux carriage doors by using a commercially available kit.  The picture above is magnetic hardware attached to a standard garage door.

We will also purchase magnetic window kits for the look of a window on the door as well.  I have no idea how it will actually look when everything is said and done.  I hope it looks fairly real.  Skymall has a really nice "carriage" door kit.  That's a picture of it to the left.  I can only hope that it actually turns out like this.


  • START: Start by July 15.
  • MATERIALS LIST:  large garage door, garage door opener for large garage door, magnetic hardware kits for both doors, window kits for both doors.
  • ESTIMATED COST: Pricing dependent upon hiring help or DIY
  • PROJECT DETAILS: SEE ABOVE
  • PROJECTED TIME LINE: 2 weeks
  • WORKERS FOR PROJECT: 2 to install faux look of carriage doors, may hire help to assist with hanging large garage door.

Thursday, February 2, 2012

Project #3 this spring summer. Replace Wood Trim around Garage.

The past few years we have noticed the trim around our garage doors was in need of repair.  By the end of last summer, the wood trim was in sorry shape and must be tackled this summer.  AHH... the joys of home-ownership.


Remove Rotted Trim


  • Raise the garage door up. Using the flat-head screwdriver, pry the old trim off the doorjamb.

  • Using your hammer, remove any nails that may be remaining. Use the claw end of the hammer to remove any residual caulk left behind by the old trim.
  • Sand down the jamb by hand using a sheet of rough-grit sandpaper. This will help ensure a smooth application.

Install New Trim

  • Close the garage door fully. Start at the top and measure the opening. Using a miter saw, cut a piece of trim to size.
  • Have a helper hold one end of the trim to the header while you hold the other end. Position the trim by allowing the weather strip to slightly bend over the garage door. Tack the trim into the header with the finishing nails spaced about 12 inches apart.
  • Measure both jambs from the ground to the trim, and cut each piece of trim for the appropriate jamb.
  • Line up your jamb trim even with the top trim, and tack into place using the finishing nails.

  • Make sure that the weather strip is even all the way around the opening. Finish nailing the trim into place.
  • Put the caulk in the caulking gun and apply a small bead between the trim and the door jamb. This will help in keeping moisture from between the trim and wood.


Allegedly... the above procedure is how this whole thing will work.  
Seems easy right?  
Somehow I don't think that this will go as smoothly as it describes.


  • START: Start by June 30.
  • MATERIALS LIST:  lots and lots of wood trim, nails, caulk, sandpaper
  • ESTIMATED COST: Don't even want to think about it.
  • PROJECT DETAILS: SEE ABOVE
  • PROJECTED TIME LINE: 2 weeks
  • WORKERS FOR PROJECT: 2 (just honey bunny and me)


    Wednesday, February 1, 2012

    Project #2 this spring. Faux Brick Front Porch

    PROJECT #2

    I will be painting our front porch in a faux brick pattern.  Replacing the worn front porch path with natural stone would be a great way to go, but it requires loads of cash...which will be spent on project #1.

    Instead of resurfacing, I'm going to give it a face-lift with paint. 


    STEP ONE:  Sweep the surface, then prime it with a concrete resurfacer, like Rust-Oleum's Epoxy Shield.

    STEP TWO:  Let dry.

    STEP THREE:  starting in one corner, use a 4-inch roller to create a "brick" with a terra-cotta-hued concrete paint. Paint another one below it, and so on, to make a border; repeat along the other side. Fill the space in between with a running bond pattern of 8-inch bricks. Don't worry about keeping them exactly the same size or the lines pin-straight; imperfections make the design realistic.

    Let dry, then watch visitors do a double take as they walk in your door.

    • START: Start by May 31.
    • MATERIALS LIST:  Rust-Oleum's Epoxy Shield, Terra Cotta Hued Concrete Paint, 4 inch roller(s)
    • ESTIMATED COST: Less than $50
    • PROJECT DETAILS: SEE ABOVE
    • PROJECTED TIME LINE: 2 weeks allowed.
    • WORKERS FOR PROJECT: 2 (just honey bunny and me)

    idea and project from:   This Old House
    http://www.thisoldhouse.com/toh

    Tuesday, January 31, 2012

    Project #1 this spring. Hedge Row.

    Arborvitae is a good choice for a hedge row because it doesn't need pruning to keep its shape.  They can reach 15 feet or more when they are mature.  As the hedge fills in, you have a solid wall of green to enjoy year round. The dense canopy of an arborvitae tree provides cover for birds and mammals year round. 

    Arborvitae trees come in many different shapes. Some, like the American arborvitae, are wide, cone shaped. Others, like the pyramidalis, are thinner. The globe arborvitae is rounded.  For my projects I will be choosing the Techny Arborvitae.


    The techny arborvitae is a fast growing arborvitae tree. They generally have denser foliage than many of the other species of arborvitae, and make the best hedges.  I plan of making a wall of green between our house and our neighbors house, as well as planting some along the side of our home to give us some shelter from the street.  When planted three and a half feet apart in a row, the techny arborvitae will grow to be a full shield in only a few years.  Once planted, a techny arborvitae requires little maintenance.
    There you have it folks.  PROJECT 1.

    • START: Start by April 15.
    • MATERIALS LIST: About 12-15 arborvitae. Ground cover / perennials to add to the foreground of the planting beds.
    • ESTIMATED COST: Thank god for Menard's gift cards for holidays, birthdays, anniversaries, etc.
    • PROJECT DETAILS:  Dig up strips of sod along both the north and south side of our property. Likely, a sod cutter will be rented to make the task of sod removal a bit easier. The north side will provide privacy from the street whereas the south side will provide privacy from the neighbors.  The trees planted along the south side will also help to shade some of the plants in the front beds that are currently getting too much light (azaleas) After the beds have been dug, the soil must be amended. After the bed has been prepared, they will be planted.  First the trees will be installed, followed by the perennials then ground cover.  After the install, both beds will be mulched.
    • PROJECTED TIME LINE: 4 weeks allowed.
    • WORKERS FOR PROJECT: 2 (just honey bunny and me)


      Monday, January 30, 2012

      Hummers

      How to get hummers.  I'm not talking about the car, nor am I being vulgar... 
      I'm talking about the hummingbird 


      Hummingbirds are found throughout North America.  They are a winged gem for every gardener.  As a matter of fact, early spanish explorers called them flying jewels.

      Are you trying to attract these little beauties to your garden this summer?  
      Read on, I'll tell you what to plant to help attract this little bird.

      But first, I'll tell you some interesting tidbits about them.
      • Hummingbirds are the tiniest birds in the world
      • Hummingbirds can flash their bright colors, as well as hide them when needed.
      • Hummingbirds are very smart and they can remember every flower they have been to, and how long it will take a flower to refill.
      • Hummingbirds can hear better than humans
      • Hummingbirds can see ultraviolet light.
      • Hummingbirds have no sense of smell.
      •  A hummingbird's heart beats up to 1,260 times per minute.
      • A hummingbird baby is about the size of a penny.
      • Females will lay a clutch of two eggs.
      • Most hummingbirds die in the first year of life.
      The last fact is the biggest reason to provide them with plenty food and consider yourself fortunate if you have been successful in attracting them to your property. 


      Plants to Attract and Feed Hummingbirds

      Trees and Shrubs

      • Azalea 
      • Butterfly Bush (Buddleia)
      • Cape Honeysuckle
      • Flame Acanthus
      • Flowering Quince
      • Lantana
      • Manzanita
      • Mimosa
      • Red Buckeye
      • Tree Tobacco
      • Turk's Cap
      • Weigela

      Vines

      • Coral Honeysuckle
      • Cypress Vine
      • Morning Glory
      • Scarlet Runner Bean
      • Trumpet Creeper
      Female Ruby-throat and Columbines
      Photo © Ann D. Martin

      Flowers

      Some may be annuals or perennials depending on climate.

      Perennials

      • Bee Balm (Monarda)
      • Canna
      • Cardinal Flower
      • Columbine
      • Coral Bells
      • Four O'Clocks
      • Foxglove
      • Hosta
      • Hummingbird Mint (Agastache)
      • Little Cigar
      • Lupine
      • Penstemon
      • Yucca

      Annuals

      • Beard Tongue (and other penstemons)
      • Firespike
      • Fuchsia
      • Impatiens
      • Jacobiana
      • Jewelweed
      • Petunia
      • Various Salvia species
      • Shrimp Plant


      The above highlighted plants are plants that we have planted around our property.  We had success last summer in attracting hummingbirds to our backyard.  We are hoping to have even more luck this summer. 


      Sunday, January 29, 2012

      Honey Bunny vs. The Funny Bunnies

      You'll shoot your eye out, kid
      Every year we battle with rabbits, and every year we become better warriors... 
      This past Christmas Lex got a [honest to god] red ryder bb gun.  The exact same gun that Ralphie had in "A Christmas Story" (which is by the way one of my FAVORITE movies).  
      Actually he got a shotgun (Remington 870 - REAL shotgun) and some bb guns.  The shotgun is to shoot zombies and burglars, the BB gun is to shoot the bunnies.  
      Yes.  I said zombies.  We are HUGE fans of the Walking Dead.  If you have not seen it yet, I highly recommend watching it.  The mid-season premier is coming up on February 12th on AMC.   Anyway... back to the bunnies.
      Lex wanted the BB gun to shoot the bunnies we found on our property this winter.  
      The bunnies cause such devastation to new plantings and bushes.  
      Which (coincidentally) every year we have so much of.
      Rabbit damage can be seen in gnawed wood and sprouts that have been nibbled to the ground.  They dig up bulbs that you have painstakingly planted, and reduce your perennials and shrubs into nubs.  A few years back they even chewed through our Christmas lights outside.  PESTS But they sure are cute.  Even as they ate all of our blueberries and strawberries last summer. 

      Now when we seen one sitting on our property, Lex runs into the house to grab the red ryder and I quickly run at the bunny [clapping my hands] shouting "run bunny, go go bunny".  By the time he will return with the gun, I have safely shooed the bunny from our yard, delivering them to safety.  So far this winter, Lex hasn't had a chance to shoot a single rabbit.  What can I say, they are destructive BUT I have a soft spot for them.  I had a rabbit named Thumper when I was a kid.  True, I bought him the BB gun for Christmas; but I can't bare the thought of him actually shooting a bunny.

      So each year we try different "weapons" to protect our home from these fuzzy tailed monsters.


      LIQUID FENCE:  This is our choice product early on in the growing season.  It seems to work from March through May.  Warning:  it is the most nasty smelling stuff you will ever encounter, and your neighbors will probably hate you for a few days.  The odor lingers for about 24-48 hours, but the product lasts a few weeks (give or take some spring storms)

      SHOTGUN BRAND REPELS ALL (GRANULES):  We swear by this product.  This year we sprinkled it in with every bulb we planted in the fall (~1100 of them).  Every few weeks during the growing season we sprinkle some on the ground.  We found that this is the product to use the beginning of summer through fall.  

      CHICKEN WIRE AROUND YOUR PLANTINGS:  Self explanatory.  The cage protects your plantings.  Just make sure to bury it slightly to discourage burrowing animals to dig under the fence.  This would work all seasons to protect your garden.

      If rabbits are a big problem in your area consider planting specimens that are "rabbit resistant".  I say that tongue in cheek because they ate my barberry bushes last winter.  Barberry is often thought to be rabbit resistant.

      Here is a brief list of flowers you can add that are thought to be rabbit resistant:
      • Agastache - Licorice sent.  attracts butterflies.  full sun. zone 5-10
      • Allium - my personal favorite...the wild onion. full sun.  zone 4-8
      • Astilbe - adds great texture to the garden. part shade.  zone 4-10. 
      • Baptisia - full sun. attracts butterflies. zone 3-8
      • Bee Balm - sun, part sun.  attracts butterflies. zone 3-9
      • Catmint - another favorite of mine. incredibly hardy. sun, part sun. zone 3-9
      • Daffodil - sun part sun. zone 3-9
      • Daylily - SO EASY TO GROW. sun, part sun. zone 3-10
      • Foxglove - part sun, zone 3-8   PROVIDE LIGHT AFTERNOON SHADE.
      • Fritillaria - attracts hummingbirds. unique looking flower. can't wait to see mine in the spring.  this is their first year.  sun, part sun. zone 4-10
      • Hellebore - one of the first plants to appear late winter/early spring. part sun, shade. winter interest. zone 4-9
      • Iris - great cut flowers.  sun, part sun. zone 3-9
      • Lambs Ears - great texture (soft and fuzzy) full, part sun. zone 4-10
      • Lavender - outstanding smell.  full sun. zone 5-10
      • Peony - unbelievable sweet smell. beautiful (if you don't mind a few ants). full sun, light shade. zone 2-8
      • Salvia - I have them everywhere in my yard. beautiful. drought tolerant. full sun. zone 4-10
      • Veronica - easy to grow.  interesting flower spikes. full, part sun. zone 4-10
      • Yarrow - attracts butterflies. great cut/dried flower. full sun. zone 3-9

      Saturday, January 28, 2012

      Sweet Peas... more than a term of endearment!

      What is a Sweet Pea?

      1.   Popeye and Olive Oil's love child (swee' pea)

      2.   Someone cute and sweet

      3.   A beautiful, fragrant flower you could start growing this weekend


      SWEET PEAS.
      more than a term of endearment  (or Popeye's baby)
      
      Here's an inexpensive January project you can do this weekend.

      Start sowing sweet peas indoors now to be rewarded with a beautiful display this summer.

      When should YOU start: In colder areas (such as the midwest), sow starting containers about 6-7 weeks before our last frost date, then plant them as soon as you can get outside and start planting; sweet peas CAN handle light frosts.

      INDOORS:  Sweet peas like a good root run, so sow them in deep cell packs that you can buy relatively cheap from garden supply stores OR make your own!  Use newspaper rolled into tubes (taped together) or...wait for it... empty toilet paper rolls to make "cell packs" for your sweet peas.  Place the tubes side by side in a tray and fill with quality peat free potting mix.  Make sure you know your seed type as some require soaking. 
      Sweet peas do not need a high temp to germinate, meaning that there is no need for a propagator.

      
      In milder climates, where the ground does not freeze, you can plant sweet pea seeds in the fall. Directly into your garden. September through November are reccommended planting months to insure that the plants grow strong root systems and then bloom in spring.
       
      Sweet peas will flourish if  they are planted in a sunny spot. These climbing annuals will need vertical support. Isn't the twiggy trellis above awesome?  It's easy to make too, provided you have the patience for collecting twigs and weaving.  Still interested...  I'll tell you how to make a simplified version called a sweet pea swath. 

      PROJECT TO BE DONE OUTSIDE IN THE SPRING.  (AT PLANTING TIME)
      * Collect a stack of twigs or branches (or buy some bamboo stakes from your garden center). 
      *At the end of the area you are wishing to plant the sweat peas, sink two tall poles about 6 inches into the ground so that they're angled slightly toward each other.  Using twine, tie the poles together so that there is a small "V" above the joint. 
      * Continue this procedure at regular intervals to create a frame. 
      * At 12-18 inches above the ground, tie a horizontal post to width between one side of the base.  Continue along the entire length of your trellis and then repeat on the other side. 
      * Set another row of horizontal posts into small  "V" above top joint.  You can secure these with twine. 
      * For additional stability and a flexible holder for your sweet peas, string lengths of twing at open   horizontal areas.
      * Plant your sweet peas.

      SWEET PEAS ARE TOXIC TO DOGS. 
      If you are planning to plant this beautiful flower, PLEASE take precautions to make sure that it is in a location inaccessible to your pets.

      Sweet pea contains a substance known as aminoproprionitrite , which gives the plant its toxic effects.
       
      Dogs that ingest sweet pea often develop symptoms that include pacing, head pressing, weakness and lethargy. According to the ASPCA, ingestion of sweet pea also can lead to seizures, tremors and even death.
       
      Dog owners should contact their veterinarian immediately if they are concerned about sweet pea poisoning

      For more information on sweet peas and other garden dangers... please visit
      http://www.aspca.org/pet-care/poison-control/plants/

      Friday, January 27, 2012

      How much longer until spring?

      WINTER.

      Truly, to a gardener it is nothing more than a speed bump in the growing season road.

      Yes, I will admit that there are some stunning features in the winter landscape.  From the cool shape of the harry launders walking stick, to the striking color of the red twig dogwood bushes.  Even the berries on vines and shrubs this time of year are quite pretty. 

      But let's be realistic... inside every gardener there is a little voice that is SCREAMING to get out and dig in the dirt...now.  Spring can't come soon enough.

      Only about 100 days until the craziness begins.  But who's counting?  :)

      I have been bombarded with several mail order garden catalogs the past month which brings me to:

      WHAT TO DO DURING THE MONTH OF JANUARY FOR YOUR GARDEN.

      Order your summer flowering bulbs and perennials now.  
      Last summer, I'm sure that as you walked around your garden you imagined adding something here or there.  You might have even jotted down some notes.
      Pull out your garden journal and start thumbing through the pages.

      There are several mail order gardening companies.  Many offer special deals this time of year in the way of free shipping or free product. Order now for delivery and planting in the spring.  This is kind of a "fix it and forget it" approach.  As the weather warms up during the next few months you will have time to head out and clean up your flower beds, or in our case DIG NEW ONES!
      By the time our beds are clean and the new ones dug, our plants will be arriving ready for planting.

      If you took a look around your yard this winter and realized you had nothing to look at, consider adding some grasses, red twig dogwood or coneflower for more winter interest next year.

      Some companies that I like are:
      • White Flower Farm
      • Burgess Seed and Plant Company
      • Dutch Gardens
      • Michigan Bulb Company
      • Spring Hill Nursary
      • Bluestone Perennials
       DID YOU KNOW...
      January is National Mail Order Gardening month
       
      Stay tuned over the next few weeks for more winter tips and to hear about our upcoming spring projects.

      Wednesday, June 1, 2011

      Natural Stone Flooring under Pergola

      After two exhausting days of digging sod, two injured backs, two days of hauling stone and one day of shoveling dirt... THE PERGOLA FLOOR IS [almost] DONE.

      The only thing left to do is a small area in front of our gate, which shouldn't take too long this weekend IF we can find more rock.


      THE BEST PART? 

      This project was done  FOR FREE.  ZIP. ZERO.  NO MONEY SPENT.


      As I've been saying we have collected rock every sunday morning for the past several months and we have two compost bins... meaning... we make our own dirt.

      The project itself was very easy.
      Don't get me wrong... it required quite a bit of muscle, but no technical skills.


      Are you thinking you LOVE it?
      Do you want to know how you can do it too?
      Well, read on... here's the scoop.


      1.) Start off by scouring your roadsides for natural flat rock, pay close attention to areas along rivers where they are working.  This rock is FREE for the taking - OR - you could pay for rock at your local stone yard or quarry.  But seeing as we are the Duke and Duchess of Frugal... we collected ours.
        2.) Remove any existing fire pits or furniture from the area you are working in.

        3.) Cut sod out of area you are working in.  The amazing thing about sod is... in just a year or so it will turn into dirt again.  I mention this because if YOU want to avoid having a sod pile in your driveway you could stack it in a garden area and forget about it.  After many years of sod piles in our drive, this is the route we have taken.  We are using one of our vegetable gardens to compost our sod.

        Obviously, we won't be using our raised garden this year.  You can see the area in the foreground  that was tilled.  This made it much easier to shovel the dirt into the wheelbarrow.
        4.) After your sod is removed, install some depth/height gauges to insure that your floor is level.  Lex tapped some stakes into the ground and ran some string from one side to the other.  We used this string as a visual guide in determining which rock to place.  We built up areas where it was lower with smaller rock and more dirt.  You could buy sand or construction gravel for this purpose too, but as I said earlier we are "fugal".

        We opted to have a "sunken" fire pit look.  We did not place stone under the fire pit.  We placed stone around it.  This gave it a custom "built in" look.


         In case you can't see the smile in the picture above...
        • I AM WOMAN HEAR ME ROAR
        • I AM EXCITED TO BE DONE LAYING STONE
        •  And last but not least...I am thinking about the COLD BEER waiting for me at the end of the day.

        5.) After our fire pit and stones were in place we tilled our garden until we had enough dirt to fill about 15 (no joke) wheelbarrows. We then used the dirt to fill in the areas between the stones.  The dirt became our grout.  We used a push broom to level it out and push it into all of the cracks and crevices. 

        6.) After it was smoothed out and all areas were filled, we watered down the entire site.  The water will help the loose dirt to firm up and become more grout like.  After it dries tomorrow, we will re-sweep the stones add more dirt.  You should expect the dirt (and stones) to settle and become lower than they initially are. But that's OK.  With a little patience and initial prep work, you'll end up with a flat surface.


        CHEERS !

        A frosty mug of Lex's homebrew.  mmm, mmm good.

        Here's to another thing off our list!

          Then VERSUS Now

          We decided to post some before and after pictures of the big blue house.

          THEN:  February 2005
             
          NOW:  June 2011   


          I would say that there is just a bit of a difference.     :)

          THEN:  February 2005

          NOW:  June 2011


          Stay tuned... today's tasks/to-dos still to come.

          Tuesday, May 31, 2011

          where do I start?


          So much has happened since we last updated our blog.


          I'll start with today.
             
          We went from this...


          That big bad boy leaning against the fence is dubbed "the widow maker".  It is standing about 4 feet tall and about 2 1/2 feet wide.  It weighs about 250 pounds.  I shimmied it into place today [mostly] by myself.


           To This!


               Every Sunday morning over the past few months, we collected rock... TONS of rock.  We had stored it in our garage in anticipation for this week.  The weather (and our backs) hadn't been cooperative over the past few days. Unfortunately we got a late start getting the stone laid under our pergola. 

               On Saturday I threw out my back.  Bummer.  After a few days of light work and rest, mine had improved.  I was ready to rock and roll.  Today we got up early and tilled the ground under the pergola.  Lex bent over to get a stone and BOOM, that's when it happened.  His back went out... game over.  Straight to the couch for Lex.  It didn't deter me.  I was on a mission.  See the rocks in the picture above?  I moved and placed them ALL!  That's right... I AM WOMAN HEAR ME ROAR.  
          At least that's how I felt until I tried to lift some of the really big ones.   
          Then it sounded more like a meow.  
          I need help with those.  Hopefully after a trip to the chiropractor, Lex will be ready to go tomorrow.  

          To complete this project, we have to:
          • Finish about 1/3 of the rock "floor"
          • Fill in between the stones with dirt
          • Re-build the fire pit
          • Plant ground cover
          • Move the furniture back under the pergola
          • Re-hang the "chandelier"
          • Re-hang the decorative windows
          ---------------------------------------------------------------------------------------------------------

          We have also turned an antique water pump into a fountain for our pond.  


          Pay no attention to the plants, rocks and other craziness around the pond.  We are in the process of re-doing the entire area.  It was done in the "pre-landscaping school phase".  Let's just say... it's not planted so nice and needs (a lot of) help.  Over the past few years this pump sat in our native prairie garden.  This year we decided to make it functional AND aesthetic.  More pictures to come over the next few weeks.


          Aw... here they are begging for food.  aren't they cute?
          This is our native prairie garden.  The pump used to be where the antique milk jug is now.  I picked up this little number this past weekend at a GARAGE SALE for $10.  I love thrifty garden finds!


          ---------------------------------------------------------------------------------------------------------

          Yesterday Lex turned an old sink into a fountain... 

          I saw this sink at an [overpriced] garden store a few years ago and just had to have it.  I knew the perfect place for it.  I was so excited to get it home and put it IN THE FRONT YARD. 

          Are you loving the ugly mirror?  GARAGE SALE FIND.  $8

          Now, I know what you're thinking... CLASSY, this woman has taste.
          And to answer your second thought:  NO we do not have a toilet with flowers planted in it.  

          This look [in the front yard] was straight out of Better Homes and Gardens... NOT

          After we came to our senses we decided to move the sink to the backyard.  We had no idea what we were going to do with it, but we knew we just couldn't have it in our front yard any longer.  So we put this thing in the willow courtyard and hung a mirror over it.  It looked better there, but there was always something "a little off" about it.  We went through a phase with flowers being planted in the bowl... but I still didn't like it. 
          Then one day...[light bulb turning on]...it hit me.  It has a spigot.  YES.  We could turn it into a fountain.  Now, I LOVE IT.  It looks cute.  After 3 years, I am finally happy with the "kitchen sink".

          There it is in the back corner with all of our hosta. 

          Friday, May 6, 2011

          knocked two things off of the to-do list today

          Today, we finished the decorative fence in the side of our yard.  After the wood has dried we will go back and paint it white to match the fences in front of our house.  We will also be adding some decorative finials to the top of the posts.
          As the spring bulbs are dying back... the summer plants are coming in nicely. 
          The paperbark maple also seems to be making a comeback.  :)  HOORAY.

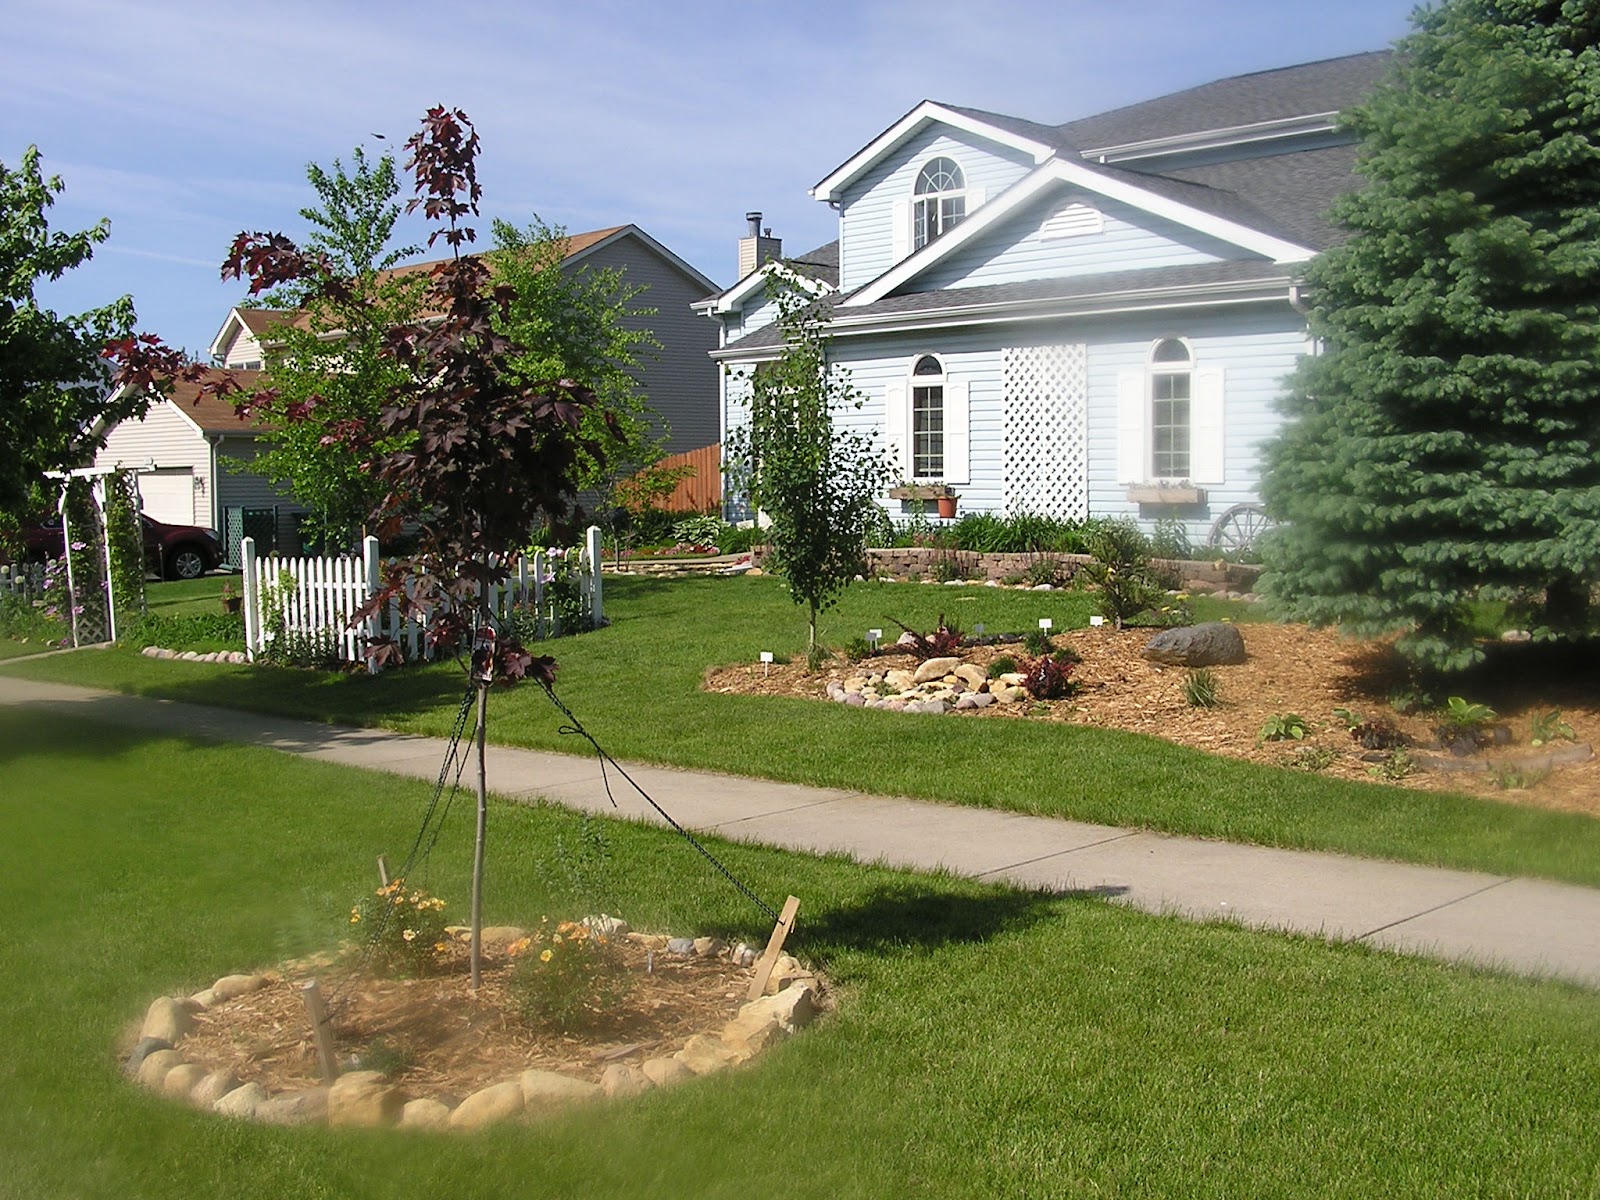
          A few days ago we finished the tree rings in front of the house.  They are completely planted and mulched.
          We went with shrub roses to add to the country "cottage" charm. 

          Today we also discovered that our egg... was an egg no more.
            HAPPY BIRTHDAY CHUCK!!  yes.  his name is chuck.  Congrats to Sunflower and Barry.


          Here are some random photos of the house from various angles.  It is essentially the "fruits of our labor" over the past few weeks...
          natural stone with thyme planted between.

          front bed with berm in background.

          front beds

          raised tree ring in front

          view of all three tree rings + front flower beds

          front flower bed  with butterfly garden and pathway in rear

          side walkway to backyard.