The "5-year" plan

When we moved into our house in 2005, we had agreed that it was a 5 year plan. In five years, the house would be painted and landscaped to our tastes. It would be done...

It's 2011.
The projects are never-ending, we have a dirt mound in our driveway the size of a suburban, It's dark out and we're still working... hit it.

Welcome to our journal about dirt, gardens and beer.

Wednesday, June 1, 2011

Natural Stone Flooring under Pergola

After two exhausting days of digging sod, two injured backs, two days of hauling stone and one day of shoveling dirt... THE PERGOLA FLOOR IS [almost] DONE.

The only thing left to do is a small area in front of our gate, which shouldn't take too long this weekend IF we can find more rock.


THE BEST PART? 

This project was done  FOR FREE.  ZIP. ZERO.  NO MONEY SPENT.


As I've been saying we have collected rock every sunday morning for the past several months and we have two compost bins... meaning... we make our own dirt.

The project itself was very easy.
Don't get me wrong... it required quite a bit of muscle, but no technical skills.


Are you thinking you LOVE it?
Do you want to know how you can do it too?
Well, read on... here's the scoop.


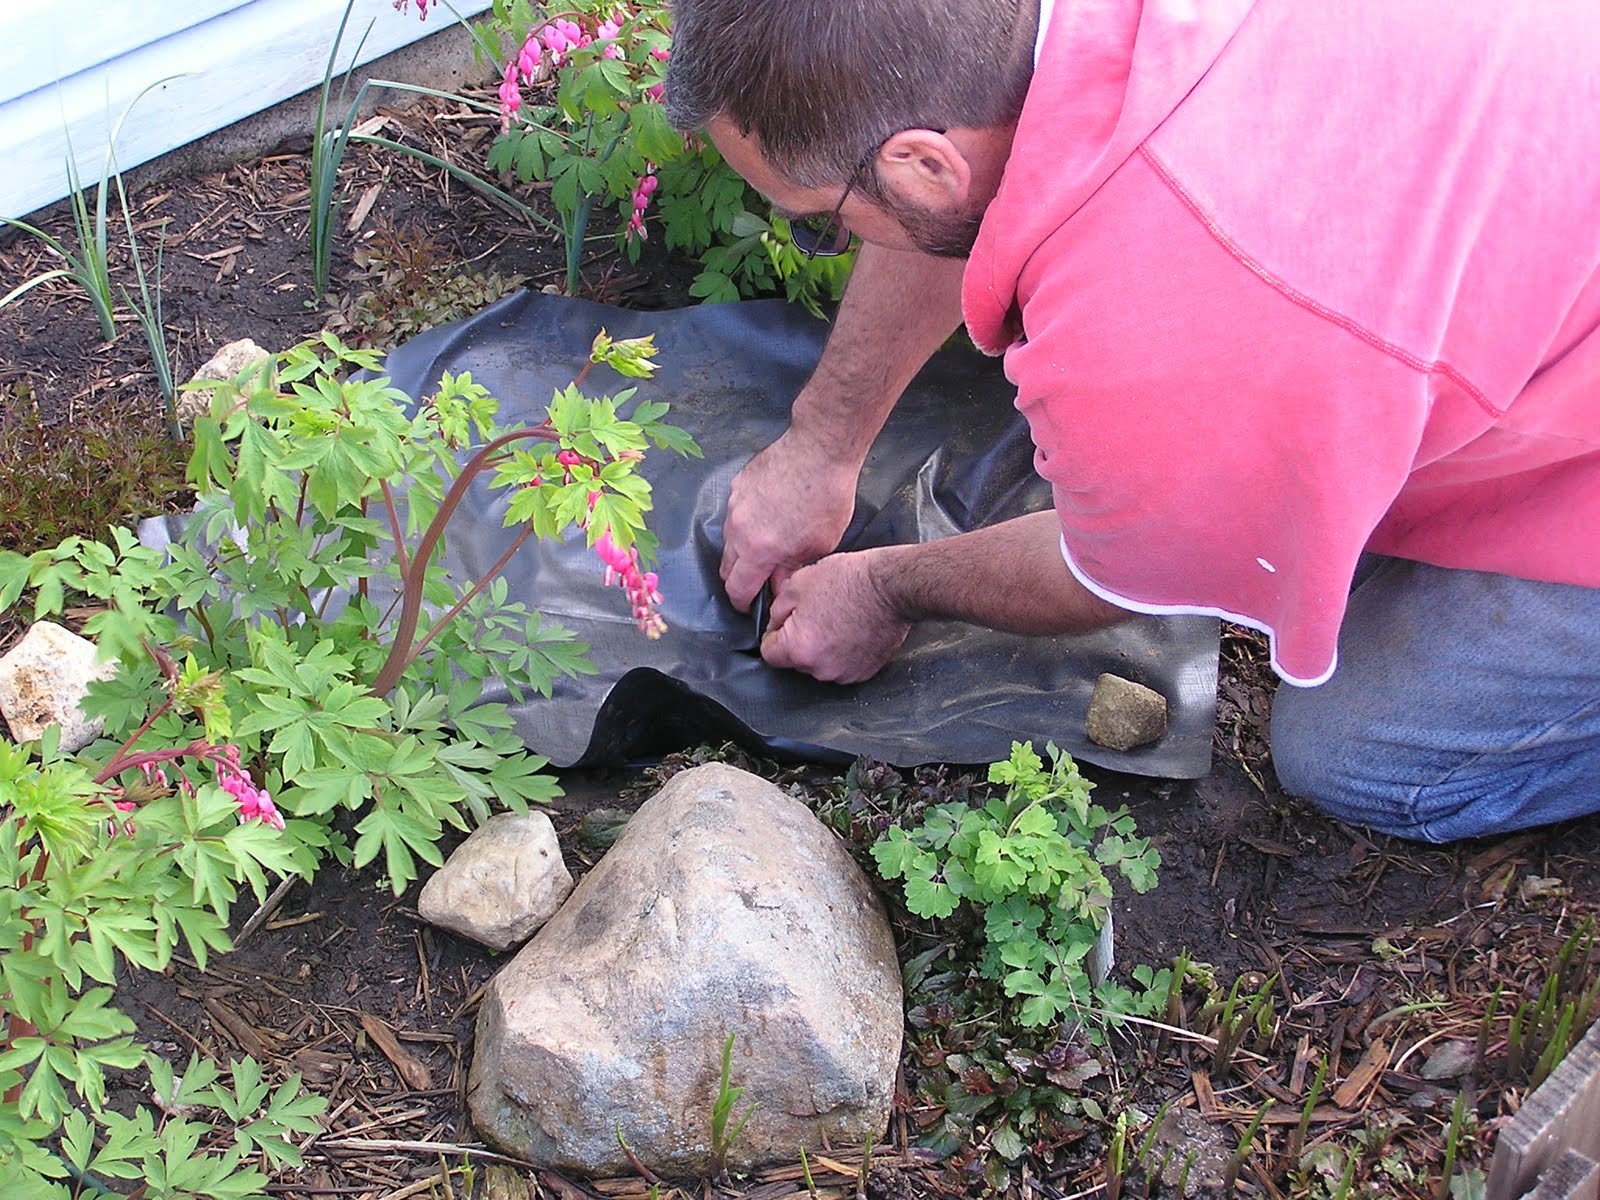
1.) Start off by scouring your roadsides for natural flat rock, pay close attention to areas along rivers where they are working.  This rock is FREE for the taking - OR - you could pay for rock at your local stone yard or quarry.  But seeing as we are the Duke and Duchess of Frugal... we collected ours.
    2.) Remove any existing fire pits or furniture from the area you are working in.

    3.) Cut sod out of area you are working in.  The amazing thing about sod is... in just a year or so it will turn into dirt again.  I mention this because if YOU want to avoid having a sod pile in your driveway you could stack it in a garden area and forget about it.  After many years of sod piles in our drive, this is the route we have taken.  We are using one of our vegetable gardens to compost our sod.

    Obviously, we won't be using our raised garden this year.  You can see the area in the foreground  that was tilled.  This made it much easier to shovel the dirt into the wheelbarrow.
    4.) After your sod is removed, install some depth/height gauges to insure that your floor is level.  Lex tapped some stakes into the ground and ran some string from one side to the other.  We used this string as a visual guide in determining which rock to place.  We built up areas where it was lower with smaller rock and more dirt.  You could buy sand or construction gravel for this purpose too, but as I said earlier we are "fugal".

    We opted to have a "sunken" fire pit look.  We did not place stone under the fire pit.  We placed stone around it.  This gave it a custom "built in" look.


     In case you can't see the smile in the picture above...
    • I AM WOMAN HEAR ME ROAR
    • I AM EXCITED TO BE DONE LAYING STONE
    •  And last but not least...I am thinking about the COLD BEER waiting for me at the end of the day.

    5.) After our fire pit and stones were in place we tilled our garden until we had enough dirt to fill about 15 (no joke) wheelbarrows. We then used the dirt to fill in the areas between the stones.  The dirt became our grout.  We used a push broom to level it out and push it into all of the cracks and crevices. 

    6.) After it was smoothed out and all areas were filled, we watered down the entire site.  The water will help the loose dirt to firm up and become more grout like.  After it dries tomorrow, we will re-sweep the stones add more dirt.  You should expect the dirt (and stones) to settle and become lower than they initially are. But that's OK.  With a little patience and initial prep work, you'll end up with a flat surface.


    CHEERS !

    A frosty mug of Lex's homebrew.  mmm, mmm good.

    Here's to another thing off our list!

      Then VERSUS Now

      We decided to post some before and after pictures of the big blue house.

      THEN:  February 2005
         
      NOW:  June 2011   


      I would say that there is just a bit of a difference.     :)

      THEN:  February 2005

      NOW:  June 2011


      Stay tuned... today's tasks/to-dos still to come.

      Tuesday, May 31, 2011

      where do I start?


      So much has happened since we last updated our blog.


      I'll start with today.
         
      We went from this...


      That big bad boy leaning against the fence is dubbed "the widow maker".  It is standing about 4 feet tall and about 2 1/2 feet wide.  It weighs about 250 pounds.  I shimmied it into place today [mostly] by myself.


       To This!


           Every Sunday morning over the past few months, we collected rock... TONS of rock.  We had stored it in our garage in anticipation for this week.  The weather (and our backs) hadn't been cooperative over the past few days. Unfortunately we got a late start getting the stone laid under our pergola. 

           On Saturday I threw out my back.  Bummer.  After a few days of light work and rest, mine had improved.  I was ready to rock and roll.  Today we got up early and tilled the ground under the pergola.  Lex bent over to get a stone and BOOM, that's when it happened.  His back went out... game over.  Straight to the couch for Lex.  It didn't deter me.  I was on a mission.  See the rocks in the picture above?  I moved and placed them ALL!  That's right... I AM WOMAN HEAR ME ROAR.  
      At least that's how I felt until I tried to lift some of the really big ones.   
      Then it sounded more like a meow.  
      I need help with those.  Hopefully after a trip to the chiropractor, Lex will be ready to go tomorrow.  

      To complete this project, we have to:
      • Finish about 1/3 of the rock "floor"
      • Fill in between the stones with dirt
      • Re-build the fire pit
      • Plant ground cover
      • Move the furniture back under the pergola
      • Re-hang the "chandelier"
      • Re-hang the decorative windows
      ---------------------------------------------------------------------------------------------------------

      We have also turned an antique water pump into a fountain for our pond.  


      Pay no attention to the plants, rocks and other craziness around the pond.  We are in the process of re-doing the entire area.  It was done in the "pre-landscaping school phase".  Let's just say... it's not planted so nice and needs (a lot of) help.  Over the past few years this pump sat in our native prairie garden.  This year we decided to make it functional AND aesthetic.  More pictures to come over the next few weeks.


      Aw... here they are begging for food.  aren't they cute?
      This is our native prairie garden.  The pump used to be where the antique milk jug is now.  I picked up this little number this past weekend at a GARAGE SALE for $10.  I love thrifty garden finds!


      ---------------------------------------------------------------------------------------------------------

      Yesterday Lex turned an old sink into a fountain... 

      I saw this sink at an [overpriced] garden store a few years ago and just had to have it.  I knew the perfect place for it.  I was so excited to get it home and put it IN THE FRONT YARD. 

      Are you loving the ugly mirror?  GARAGE SALE FIND.  $8

      Now, I know what you're thinking... CLASSY, this woman has taste.
      And to answer your second thought:  NO we do not have a toilet with flowers planted in it.  

      This look [in the front yard] was straight out of Better Homes and Gardens... NOT

      After we came to our senses we decided to move the sink to the backyard.  We had no idea what we were going to do with it, but we knew we just couldn't have it in our front yard any longer.  So we put this thing in the willow courtyard and hung a mirror over it.  It looked better there, but there was always something "a little off" about it.  We went through a phase with flowers being planted in the bowl... but I still didn't like it. 
      Then one day...[light bulb turning on]...it hit me.  It has a spigot.  YES.  We could turn it into a fountain.  Now, I LOVE IT.  It looks cute.  After 3 years, I am finally happy with the "kitchen sink".

      There it is in the back corner with all of our hosta. 

      Friday, May 6, 2011

      knocked two things off of the to-do list today

      Today, we finished the decorative fence in the side of our yard.  After the wood has dried we will go back and paint it white to match the fences in front of our house.  We will also be adding some decorative finials to the top of the posts.
      As the spring bulbs are dying back... the summer plants are coming in nicely. 
      The paperbark maple also seems to be making a comeback.  :)  HOORAY.

      A few days ago we finished the tree rings in front of the house.  They are completely planted and mulched.
      We went with shrub roses to add to the country "cottage" charm. 

      Today we also discovered that our egg... was an egg no more.
        HAPPY BIRTHDAY CHUCK!!  yes.  his name is chuck.  Congrats to Sunflower and Barry.


      Here are some random photos of the house from various angles.  It is essentially the "fruits of our labor" over the past few weeks...
      natural stone with thyme planted between.

      front bed with berm in background.

      front beds

      raised tree ring in front

      view of all three tree rings + front flower beds

      front flower bed  with butterfly garden and pathway in rear

      side walkway to backyard.


      Saturday, April 30, 2011

      How we made our rock fountain for under $10

      Step 1

      We buried a large bucket in the ground.  Make sure the bucket is below the surrounding top of the dirt.

      The bucket was $6.99 from Menards.
      Step 2

      We then positioned a large piece of pond liner over the bucket and surrounding dirt.
      We had leftover pond liner from when we built our pond.
      Step 3

      We cut a small hole in the liner over the center of the bucket.


      Step 4

      Next we positioned several rock from larger to smaller over the liner.

      The rock was found on the side of the road when the village put in sewer lines.

      Step 5

      We then drilled holes in each of the rocks using a masonry bit.
      Step 6

      We used a small fountain pump with a hose attached.   We put the pump into the bucket under the liner, ran the hose up through each of the rocks as we placed them over the liner.
      The pump was a leftover part from a fountain that stopped working.

      Step 7

      After making sure the system is working we trimmed the liner back and then added additional rocks to hide the liner.

      FINAL COST FOR PROJECT = $6.99


      Sunday, April 24, 2011

      Today marks the end of a BUSY weekend

      WHAT DID THE BONAM'S DO TODAY?
      1. Entryway complete
      2. (1) tree ring in the front yard done
      3. Planted several pots of annuals PLUS added a birdbath to the frontyard.
      4. Finished the fountain in the backyard
      5. Fertilized each and every tree on our property
      6. weeded and dead headed the gardens in the front yard.
      7. Planted creeping thyme in the rock "garden" in the front yard
      8. Blenderized moss to paint on several rocks around the property.

      1. We finished our entryway by adding the "sidelights" to our door. 
      Have I mentioned that I love Big John's flea market in Joliet?  If you are in the area, please check it out. With a little imagination and some elbow grease, you are sure to find something that you will love there.  http://bigjohnsfleamarket.com/


      2. Finished (1) of the tree rings in front yard
      Ok, so this ended up being a bigger project that I originally thought that it would be.  After digging just one of the tree rings, we decided to postpone the 2nd until next weekend. 
      The grass is so long in the front yard; it looks terrible, but we're not able to cut it yet as it was reseeded.  We're trying to give it a chance to grow.   It will be cut later this week, before we spray the lawn with weed killer. 

      3. Planted several pots of annuals
      After finishing the tree ring, I stood up and realized that the bench in the front garden looked naked and was in desperate need of some flowers.  We did a quick Menards run, and rushed home to get back to work.


      4. Finished the fountain in the backyard.
      We still have to hide some of the plastic around the edges, but it is (mostly) done.
      We'll show you the finished picture, but go over the details of how it was made tomorrow.  Because we are re-doing the pond area in the backyard, we needed to give the birds a moving (safe) water source.  Last year we had some birds drown in the fountain that we had.  So, with a little creativity... we made this fountain for about five bucks!  The water is fed up through the stones and "bubbles" out the top and over the rocks. 

      5. Fertilized the trees. 
      This is a no brainer, I've urged everyone to do this for the past few weeks.  Lex figured out a quick trick to make this job go faster.  You can use a drill with an auger attachment to drill the holes and place the fertilizer spikes in (we use Jobe's tree spikes).  NO MORE BROKEN SPIKES!

      6. Weeded and Dead-headed flowers.
      TIP:  If you keep your flowers dead-headed, they are more likely to re-bloom.  Simply pinch off the spent bloom.

      7. Planted creeping thyme in the front yard between the stepping stones.

      Creeping thyme is a vigorous ground cover.  I planted 6 today, but still need a few more for more immediate coverage.  This should fill in nicely by the end of summer.

      8. Blenderized moss.
      Yes.  You read that right.
      Moss instantly gives items such as pots and rocks an established, weathered look.  Both Lex and I enjoy the look of moss on rocks.  It is supposed to be pretty mild and rainy this week, so we thought it would be a perfect time to try to grow some moss.  We started by harvesting moss from our backyard.  We put two handfuls of moss in the blender along with 1 quart of buttermilk.  NOTE:  There are several variations of this recipe.  You can use yogurt and manure in place of the buttermilk.  Don't be too aggressive with the blender and puree it, instead use the "pulse" until it is blended.  Once it was blended, we wandered around our property with the blender and paint brush splattering goo on rocks.  This will work best on damp shady areas that are north facing.  Once you have the goo on the rocks, make sure to keep it moist by misting it with a spray bottle. 
      moss smoothie anyone?

      To make it look natural, we put it on the undersides of rocks and in crevices.

      This is a north facing area under our pine tree (on the berm) that still needs to be planted.

      Tomorrow, we will give step-by-step instructions on how you can build your own fountain for about $5.

      Saturday, April 23, 2011

      A fun day in the garden

      Lex couldn't help but snap a picture of our EMPTY driveway.  It is nice to see that the driveway is once again functional. It hasn't looked like this in four years.  Now that this sentimental moment is out of the way...it is time to move on to the walkway to the front yard. 


      We started our path... by laying out the stones in an order and size that looked good.  After we had them layed out, we used some spray paint to outline around where each rock will sit.  After the outline was created, it was time to cut out the "circle" and dig out the sod.  After the holes were dug, Lex turned the soil with our mantis so that we could make the rocks lie flat.


       We then went back through and leveled out each rock and backfilled the hole around the stone.  This space around the stone will eventually fill in with grass.    We opted to leave the grass in between to maintain some of our lawn.  You could rip out a larger area/strip of grass, lay down stones and plant a ground cover in between them.  But for us, we felt it would be easier to maintain our yard if we could mow right over them.
      This is what the finished project looked like today.

         
      The pathway extends all the way to the clean drive.
      We also did some fun & quick finishing touch projects today.  I put this old barnwood bench in one of the front gardens.  It has a few stones leading up to it.  I figure I can put a pot of flowers on top of it.

       Remember last weekend when I mentioned that I had scored some cool items from Big Johns in Joliet...

      We hung the windows today, and will get the doors in place tomorrow.  It should give the entryway an instant face lift 

      On a side note, a complete stranger drove past our house today and stopped to compliment us.  She said that she drives past our house everyday and just wanted to tell us how nice it looked.  
       It is NICE to hear this, as we have never been that  house.  


      For the past four years, we had the dirt mound and broken down suburban in our driveway.  

      Tomorrow we will finish off the tree rings in the front, and hang the "side lights" on either side of our front door.

      But for today, I will end this entry with a very cute picture of one of our resident birds.
      When she got off their nest today, I couldn't help but sneak a peek.    There are at least 2 bright blue eggs in the nest.